
get started
Membership Management
Advertising network
Banners and System Stats
Last Update :
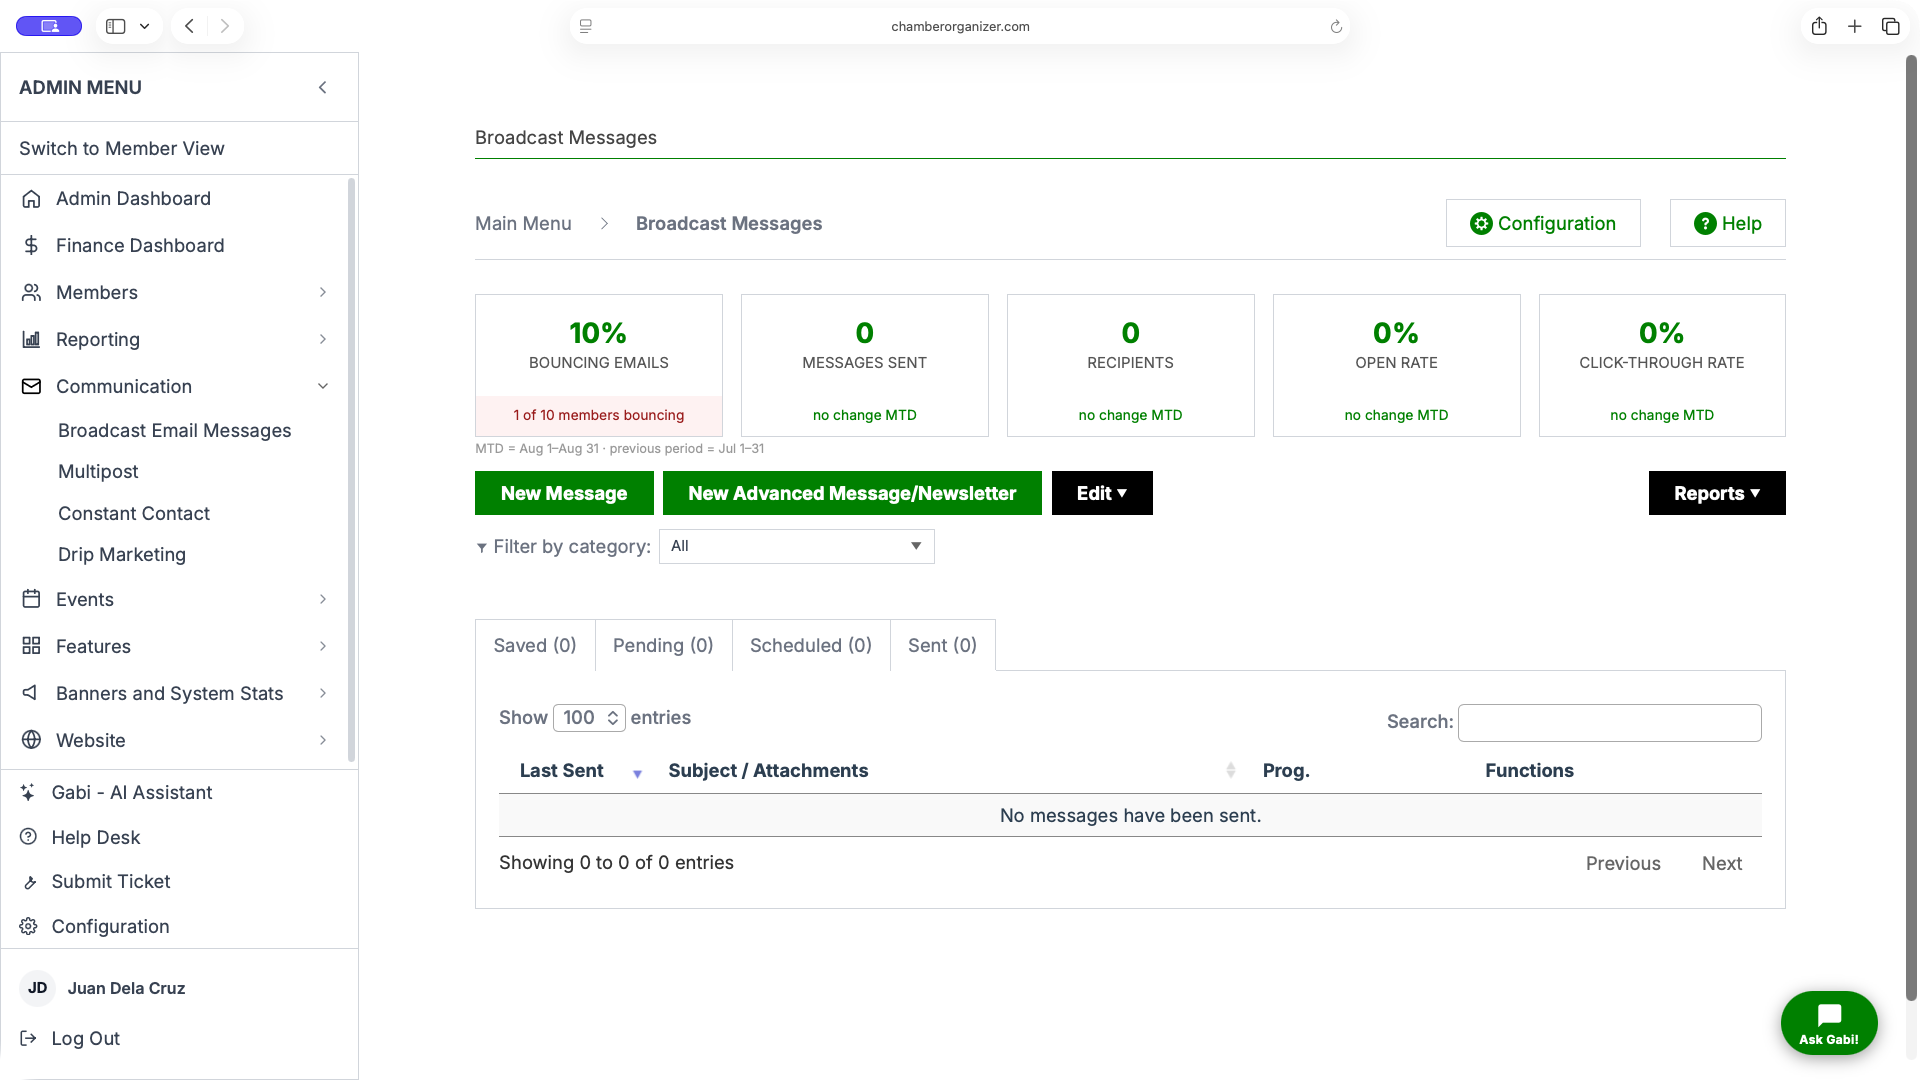
The dashboard shows recent performance stat cards across the top – messages sent, recipients, open rate and click-through rate (where those are enabled), and a Bouncing Emails card that links to the Bounce List. Below the stats, your messages are organized into tabs:
- Saved – Drafts you've started but not sent.
- Pending – Messages submitted by members, waiting for admin approval to send.
- Scheduled – Messages set to send on a future date...
- Sent – Your sending history (shown for a set period of time).
You can filter the list by template or category, and use the Reports menu for the Monthly Report and (where enabled) the Click-Through Report.
Starting a new message
Use the buttons at the top of the dashboard:
- New Message – The standard message composer.
- New Advanced Message/Newsletter (where enabled) – A richer drag-and-build editor that can also be published as a newsletter on your website.
You can also reuse a previous message: in the Sent tab, the Copy action starts a new message pre-filled with that message's content, and View / Send reopens a message so you can add recipients and send again.
Composing and sending: the four steps
Creating a message walks you through a four-step wizard, shown as a stepper at the top: Compose → Recipients → Review → Send. Use Continue » to move forward and « Back to return to a previous step. On the first step you can also Save Message to keep it as a draft.
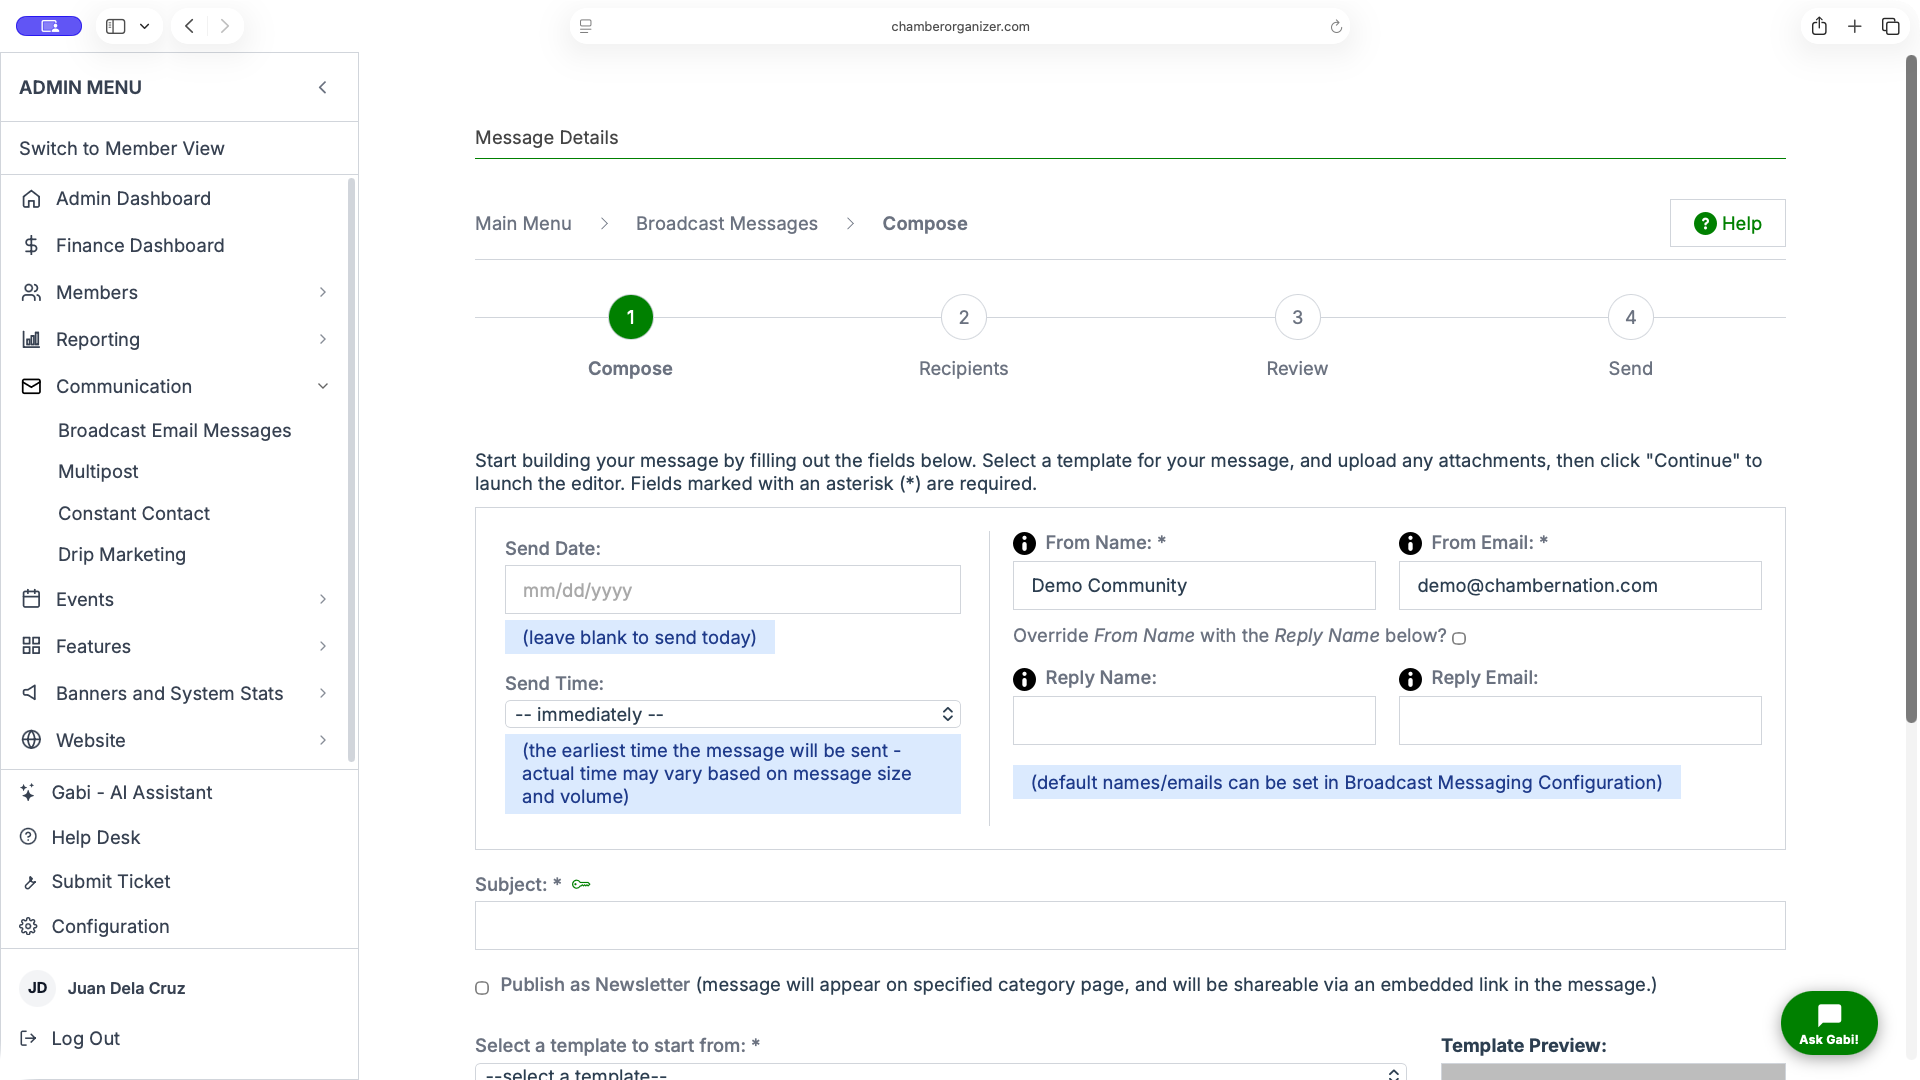
- Compose
- Send Date / Send Time – Leave the date blank to send today. Choose a time, or “immediately.” The selected time is the earliest the message will go out; the actual time can vary with sending volume (see Scheduling and send timing below).
- From Name and From Email – Who the message comes from. The From email should use a domain configured to send through the system (see the deliverability note below). You can optionally override the From name and set a separate Reply Name and Reply Email so replies go where you want. Defaults can be set in Broadcast Messaging Configuration.
- Subject – Your subject line. The Replacement Keys link lists merge tags (like the recipient's first name) you can drop into the subject or body.
- Template / Message – Choose a template and write your message in the editor. You can optionally include a personalized salutation. (Tip: avoid pasting formatted text directly from Word or other apps – it can trigger spam filters. Paste as plain text instead.)
- Attachments – Expand the Attachments section to upload files to send with the message (there is a per-file size limit). Note that including attachments will result in your message taking longer to send - keep this in mind when sending to large groups, and only include attachments when linking to the file in the email body isn't feasible.
The advanced editor adds extra options such as a preheader (preview text) and, where enabled, publishing the message as a website newsletter in a chosen category and on a chosen date. - Recipients -Choose who receives the message. You can build the recipient list several ways and combine them:
- Add by Mailing List
– Add everyone opted in to a list (Board Members, Newsletter, E-Newsletter, Member Email List, Prospect List, or your custom lists).
- Add by Membership Plan – Add all members of a chosen member type, optionally filtered by status (active, dropped, pending, etc.), and optionally including cross-referenced members.
- Pick individuals – Select one or more specific members from a list and add just them.
- More Options – Add recipients by many other filters – project/community, join date, business category, address, county/region, event registration, custom fields, custom reports, advanced search, and more.
The Recipient List panel shows your running total and lets you remove recipients or clear the list. See the Managing Lists help for best practices on building clean recipient lists. - Review
- This is your confirmation step. Review the From/Reply details, subject, a desktop and mobile preview of the message, the attachments, and the recipient list. You can run a Spam Analysis here, which checks your subject and body for content that recipient mail servers might flag as spam. When everything looks right, click Send the Message (or Schedule the Message if you set a future date).
- Sent
A confirmation screen verifies the message was sent (or scheduled), with links back to the Broadcast Messages dashboard or the main menu.
Scheduling and send timing
If you leave the send date blank and choose “immediately,” the message sends as soon as you confirm it. If you set a future date and/or time, the message is placed in the send queue for that slot (times are US Eastern). The chosen time is the earliest the message can go out – depending on how much other mail is queued, it may send right at that time or wait briefly for its turn. Scheduled messages appear under the Scheduled tab until they send.
After a message is sent
From the Sent tab, each message offers actions including:
- Stats – Engagement details for the message.
- Copy – Start a new message from this one.
- Printer-Friendly – Open a print-friendly version of the email.
- History – A content/audit history for the message.
- View / Send – Reopen to add recipients and send again.
- Delete – Remove the message.
Protecting your deliverability
To keep your messages landing in inboxes, send from a valid From address whose domain is authorized to send through the system (SPF and DKIM configured), and review the
Bounce List regularly to clean up invalid addresses. Repeatedly emailing bad addresses can hurt your sender reputation and cause messages to be blocked. For guidance on building good recipient lists, see the Email Lists help article.